Introduction
Today we are going to see a very simple project : turning on a LED by pressing a button. It is an easy exercise that will make you discover your board and a part of the FPGA workflow. This article is meant for the very beginner who just received an FPGA dev board and want to run something else than a code example.
1.Prerequisites
- A board compatible with icestudio (list on the website and inside the app itself.)
- IceStudio and YOSYS installed.
- (recommended) A Linux distro (ubuntu)
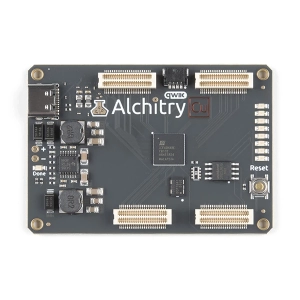
I choose the board Alchitry CU that features a Lattice iCE40 HX FPGA. You will find this FPGA on many dev board because it is one of the rare FPGA that have been retro-engineered and have an open source suite available (Yosys with Icestorm). So you can learn FPGPA without paying a license. You can buy it here (Non-affliated link)
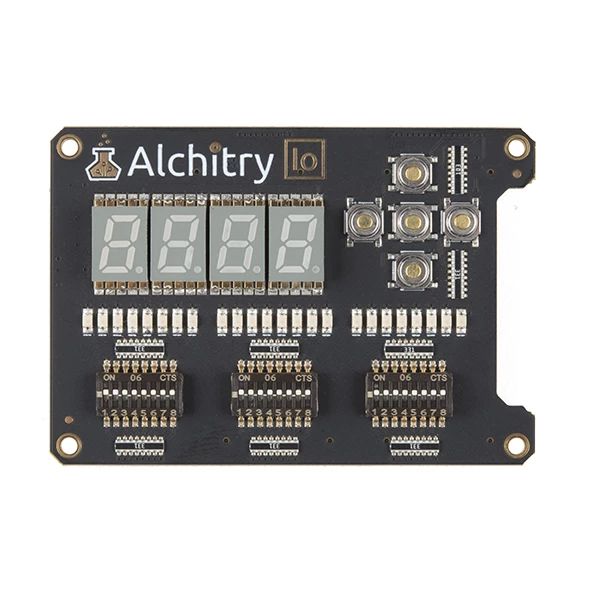
With this board I took the Alchitry Io Element Board which features the button and the LED we are going to use today. You can buy it here (non-affiliated link)
If you have another dev board just check that you have a button and a LED accessible by your FPGA.
I am on Manjaro distrubition (I use arch by the way 😉 ) and we will use IceStudio with Yosys. Both software have an installation documentation on their website that is easy to follow. I don’t recommend you to be on the same distribution as me (ubuntu is a good choice) but I recommend that you use a GNU+linux distribution. Choose a board that is compatible with IceStudio. I will do another tutorial with Vivado and a Xilinx board later.
2.Feasibility
I wrote in the introduction, “turning on a LED by pressing a button”. First we have to ask ourselves some questions.
First : can we do this project on our board ?
Second : Which button do we want to push ?
Third : Which LED do we want to turn on ?
To answer this question only one thing will help us : the holy RTFM (Read The Fucking Manual, for the newbie).
The two manuals we need here are the schematics. We will find them on the shop page where you bought your board.
Here on the document tab, download the alchitry CU schematic (pdf) for the alchitry CU board.
Here -> documents -> Alchitry IO shematics (pdf)
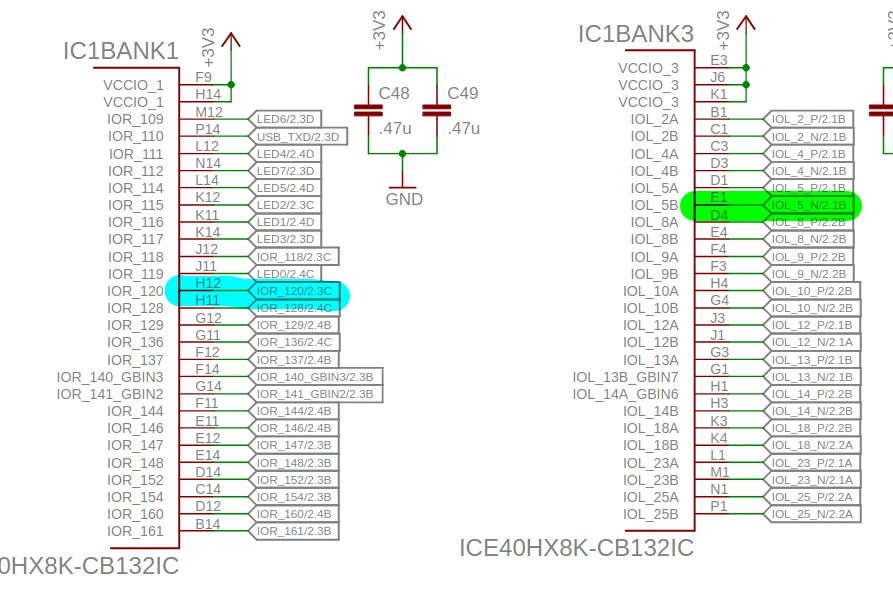
First let’s find a LED and a button on the schematics of the Alchitry IO board, I choose the LED 24 (bottom green) and the button S3 (bottom blue). By searching by name in the document, you will find where they go. The LED 24 is connected to the connector B1A on its 11 pin (called A11 by Alchitry). And the button S3 is connected to the connector B1B on its 23rd pin (B23). I let you choose another LED and button as an exercise.
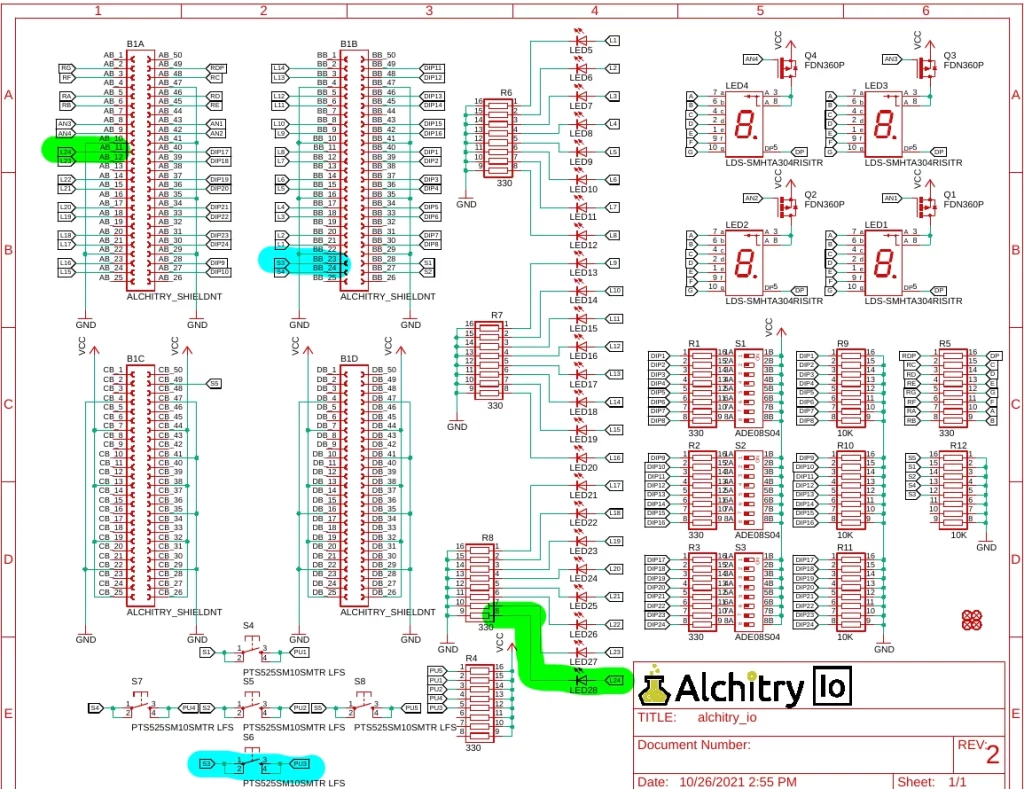
The connectors purpose is to connect (…yes it is very deep) the IO board to Alchitry CU board. So we must find out what is the name of A11 and B23 pins on the alchitry CU board. It is not really difficult: B1A one the IO board is connected to Bank A on the CU board. B1B is connected to Bank B. Take the 11 pin on Bank A and the 23 pin on Bank B, to find where they lead to…
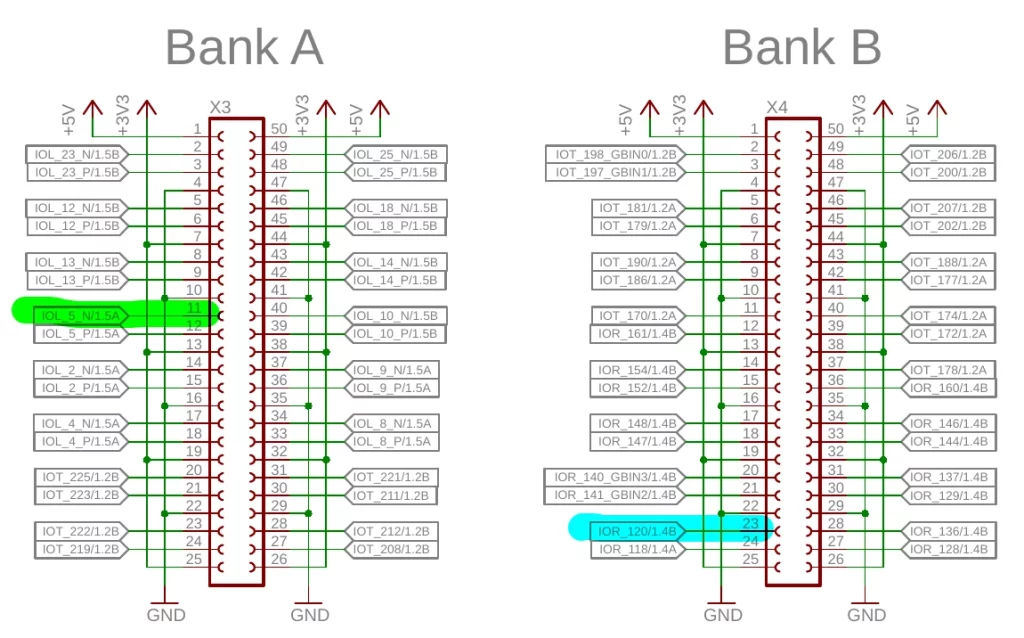
Spoiler alert: they lead to our FPGA !
Since our button and our LED are connected to our FPGA, we can control them. Which answer our three questions:
- Can we do this project on our board ? Yes, the button and the LED are connected to our FPGA.
- which button ? S3 which is the bottom one of the cross.
- which LED ? The LED 24 on the far left.
Of course I encourage you to do the “tracking wire” exercise by yourself for all the other LEDs and buttons on the board. If you have another board… I am sure you can do it by yourself.
As an FPGA engineer, you should be able to read the schematics. Being able to create a schematics is not mandatory, being able to communicate with your hardware engineer colleague IS mandatory.
3. Turning on the light
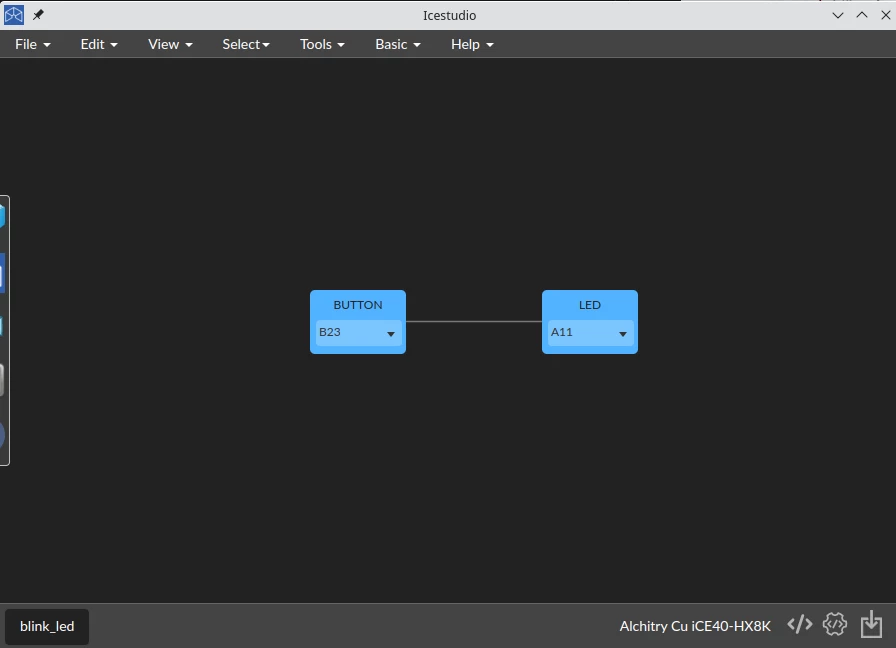
After launching Icestudio, install the toolchain as suggested. Create a new project and choose the Alchitry CU board.
Click on Basic->input, name it “button”. FPGA pin must be checked. Click OK. Choose B23 as pin as we saw earlier.
Click on Basic->output, name it “LED”, FPGA pin must be checked. Click ok. Choose A11.
Click on the wire of the button to connect it to the LED. That’s it. Your project should look like this:
Now:
- Mount the IO board on the CU board.
- Connect the CU board to your computer with the USB cable.
- tools->verify (just check the syntax of the generated code).
- tools->build (generate bitstream)
- tools->load (load bitstream on FPGA)
- push the button on the bottom of the cross.
- Be amazed by your new knowledge making the world shine brighter… only around LED 24, but … still.
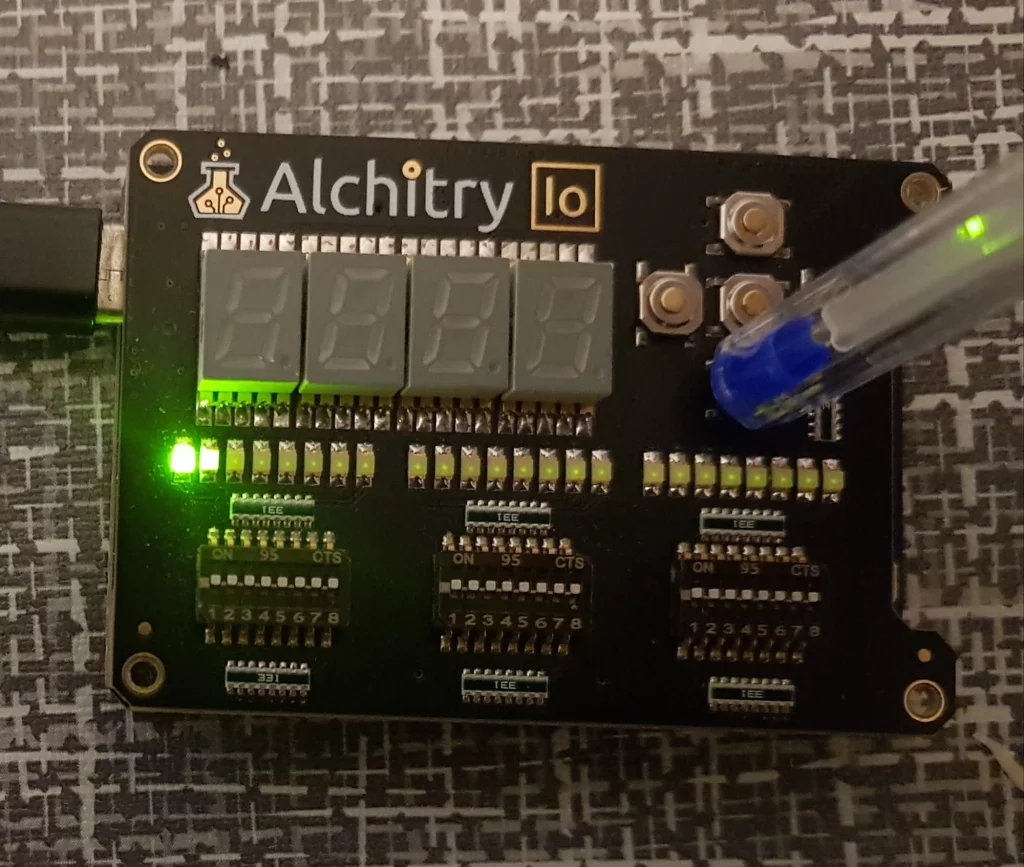
Fun fact : I am using a plastic pen on the metallic button because my finger has a conductivity high enough to turn on the led without pushing the button.
Conclusion
Easy, isn’t it ? We push the button and the LED turn on. We release the button and the LED is turned off. Don’t make this bored face, I know you pushed the button several times like a child ! But what if I want the LED to stay turned on after pushing the button ? This is where things get interesting and it is the topic of the next article. We will finally get to use what we saw in my previous article about DFF. We will see two very basic designs that use DFF : rising edge detector and the divider by two.
If you have any question, I will be pleased to answer it in the comment section. Any insult ? I will be happy to ignore it on twitter :p
If you like the blog, share this post and save it as a bookmark on your favorite browser 😉