Hello, FPGAmigos! In this series of articles on Chisel, we’ve discussed operators, multiplexers, and registers. Now, let’s engage in a practical session where we apply what we’ve learned from these articles to design a basic digital circuit. Today’s menu includes: TFF, rising edge detection, counter, shift register, and debouncer. For those interested in using Icestudio for a similar project, check this article. So grab your shield of determination and your sword of curiosity, and let’s dive into the realm of beginner projects.
I. The Project Specification
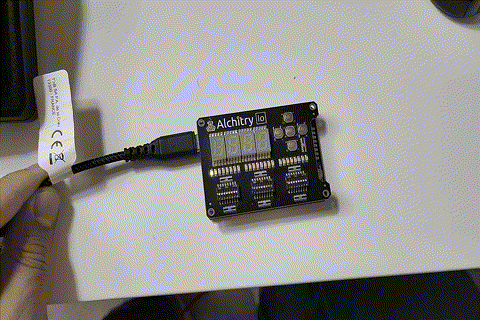
The project is straightforward: a string of LEDs that mirrors the content of a shift register. We will use two buttons: the first button to decide whether to input a 0 or a 1 at the beginning of the shift register, and the second button to enable the shift register. The project code is available on my github.
II. Cleaning the Input Signals
Since we’ll be using buttons as physical interfaces, we need to account for a phenomenon known as ‘debouncing’. For those unfamiliar, when pressing a physical button or switch on your board, the associated signal doesn’t transition cleanly from 0 to 1 (or 1 to 0): it bounces! This bouncing causes the signal to oscillate randomly between 0 and 1 for a brief period. This duration may seem negligible to you, but not to your FPGA, which has ample time to sample several random 0s and 1s before the signal stabilizes at the intended value. This can result in your FPGA registering multiple button presses when you intended only one.
The solution: configure your FPGA to recognize a button press only if the signal remains stable for a sufficient duration.
How? This brings us to the first basic design we’re examining today: the counter!
How to design a Counter ?
FPGAs fundamentally operate in parallel, so we must create structures that introduce the concept of sequence. You can use a register to delay a signal for one cycle, or a shift register to delay a signal for n cycles (where n is small). However, it’s inefficient to use a million registers just to delay 1ms with a 100MHz FPGA. Hence, we must learn how to count with our FPGA.
Let’s assume our button is considered pressed if the signal remains 1 for 1ms. We must count to one million with an FPGA operating at 100MHz. In binary representation, one million can be accommodated in a log2(1000000) = 19.93 ~ 20 bit word. Compared to 20 registers vs. a million, the binary representation clearly offers a more efficient trade-off.
Below is an example of a counter. Remember, it’s not the only way to implement this; you can design your own counter with unique features and tradeoff. In digital design, there are always multiple methods to accomplish the same task, each with different trade-offs. What works best will depend on your specific context and constraints.
object conf {
    val delay1ms = 1000000
}

class Counter extends Module{
    val io = IO(new Bundle{
        val enable = Input(Bool())
        val count = Output(UInt(log2Ceil(conf.delay1ms).W))
    })

    val counter = RegInit(0.U(log2Ceil(conf.delay1ms).W))
    val count_cases = Seq(
        ~io.enable                                  -> 0.U,
        (io.enable & (counter < conf.delay1ms.U))   -> (counter + 1.U),
        (io.enable & (counter === conf.delay1ms.U)) -> counter
    )
    counter := MuxCase(0.U, count_cases)
    io.count := counter
}
So, how does it work? Firstly, we declare the register for the counter using RegInit, as covered in the Chisel Registers Tutorial. The log2Ceil function from the chisel3.util package is used to compute the log2 of one million and round it to the nearest upper integer, resulting in a 20-bit register. This register is initialized at 0, because the counter start at 0.
Next, a MuxCase is employed to manage the various “pushing” conditions. If you’re not familiar with MuxCase, you can review my Chisel Multiplexers Tutorial.
The count_case is a Scala sequence containing tuples with the following format: (condition -> signal to return). The “io.enable” will be connected to the button signal and is active high.
- “~io.enable” represents the case where the button is not being pressed. If the button isn’t pushed, the counter should be 0, thus “0.U”.
- “(io.enable & (counter < conf.delay1ms.U))” indicates the condition where the button is pressed for less than 1 ms. In this case, we should increment the counter, thus “counter + 1.U”.
- “(io.enable & (counter === conf.delay1ms.U)) -> counter” corresponds to the situation where the button has been pressed for 1ms or more. We stop counting to prevent the counter from overflowing and restarting. This ensures that the FPGA doesn’t interpret a 2ms or longer press as two separate button presses.
And there you have it! The basic elements for a counter: registers, a multiplexer, and an addition. Each element corresponds to a topic from the last three articles on the blog.
How to do the Debouncer ?
The debouncer simply uses the counter we have just created:
class Debouncer extends Module{
    val io = IO(new Bundle{
        val toDebounce = Input(Bool())
        val debounced = Output(Bool())
    })

    val my_counter = Module(new Counter)

    my_counter.io.enable    := io.toDebounce
    io.debounced            := my_counter.io.count === conf.delay1ms.U
}
We connect the signal “toDebounce” to the counter enable. The “io.debounced” signal is asserted when the counter reaches the delay1ms threshold. As long as I press the button (after 1ms), io.debounced will be asserted as 1.
With this, we can debounce our two buttons and obtain clean signals. For the shiftButton, which enables the shifting, we only need to detect the moment the button is pressed with a rising edge detector.
We will use the stateButton to control the value that we input into the shift register. Each button press will toggle the value between 0 and 1. To accomplish this, we will need a Toggle Flip Flop.
III. Core Functions
How to do a rising edge detection ?
The rising edge detector is straightforward. If the signal transitioned from 0 to 1, we have a rising edge. If the signal changed from 1 to 0, we have a falling edge.
This concept translates into Chisel as follows. Given its simplicity, we can define a function to do it quickly. We will delve deeper into the notion of function and generics later, but for now, it’s helpful to know we can implement it in this way :
object util {
    def detectRisingEdge(x: Bool) = x && !RegNext(x)
}

class ButtonPushed extends Module{
    val io = IO(new Bundle{
        val button = Input(Bool())
        val pushed = Output(Bool())
    })

    val myDebouncer = Module(new Debouncer)
    myDebouncer.io.toDebounce := io.button
    io.pushed                 := util.detectRisingEdge(myDebouncer.io.debounced)
}
Given that the rising edge detection is quite a common function, it’s useful to have it available as a function that can be called in one line, rather than as a full module.
As demonstrated, when the button is debounced, the rising edge detector generates a pulse in the cycle following the io.debounced transition from 0 to 1.
How to do a Toggle Flip-Flop (TFF) ?
The toggle flip-flop is simply a register where the ‘q’ output is connected to its ‘d’ input through an inverter, and the copy to the ‘q’ output is activated by the enable signal. When ‘enable’ is asserted, ‘q’ becomes “not q”. It’s also often referred to as a “divider by two” because ‘q’ will be asserted as 1 for every two assertions of the enable signal to 1.
class TFF extends Module{
    val io = IO(new Bundle{
        val out = Output(Bool())
        val enable = Input(Bool())
    })

    io.out := ~RegEnable(io.out, 0.U(1.W), io.enable)
}
It uses the RegEnable explain in Chisel Register Tutorial.
Now that you know how to do a TFF, I don’t want to see any of you implement a counter that goes from 0 to 1 !! (I actually did it when i was student hahaha)
We can now connect the debounced stateButton to the Toggle Flip-Flop (TFF) and use this configuration to control the state that will be pushed into the shift register.
class StateToggler extends Module{
    val io = IO(new Bundle{
        val button = Input(Bool())
        val state = Output(Bool())
    })
    val myTff        = Module(new TFF)
    val buttonPushed = Module(new ButtonPushed)
    buttonPushed.io.button := io.button
    myTff.io.enable        := buttonPushed.io.pushed
    io.state               := myTff.io.out
}
How to shift LEDs ?
To shift the LEDs we are going to design a Deserializer which is simply a shift register that output every intermediate register.
class ShiftLeds extends Module{
    val io = IO(new Bundle{
        val in = Input(Bool())
        val en = Input(Bool())
        val leds = Output(UInt(24.W))
    })

    val my_shift = ShiftRegisters(io.in, 24, 0.U(1.W), io.en)
    io.leds := Cat(my_shift)
}
The io.in will be io.state from the StateToggler, and io.en will be the shiftButton. As I explained in the Chisel Registers Tutorial, ShiftRegisters return a sequence of UInt representing all the intermediate registers. By using the “Cat” function, I concatenate all the 24 bits into a single 24-bit word. Given that my board has 24 LEDs, I can bind each bit of the 24-bit UInt to one LED.
III. The Top Module
class AlchitryCUTop extends Module {
    val io = IO(new Bundle{
        val stateButton = Input(Bool())
        val shiftButton = Input(Bool())
        val leds = Output(UInt(24.W))
    })
    // the alchitry CU board has an active low reset
    val reset_n = !reset.asBool

    withReset(reset_n){
        val stateButton = Module(new StateToggler)
        val shiftButton = Module(new ButtonPushed)
        val shiftedLeds = Module(new ShiftLeds)
        // buttons are active low on the board
        stateButton.io.button := ~io.stateButton
        shiftButton.io.button := ~io.shiftButton

        shiftedLeds.io.en := shiftButton.io.pushed
        shiftedLeds.io.in := stateButton.io.state
        io.leds := shiftedLeds.io.leds
        }
}
The left button is the shift button and the bottom one is the state toggle button.
Conclusion
Well, FPGAmigos, we’ve reached the end of this Chisel project tutorial. We’ve explored button debouncing, used counters for signal stability, and delved into rising edge detectors and toggle flip-flops. We’ve practically applied these principles to build a basic digital circuit featuring a shift register and LEDs.
Remember, in digital design, there’s more than one way to crack a problem – different approaches come with different trade-offs. The best solution depends on your specific context and constraints.
As you progress in FPGA and Chisel, keep these lessons in mind and use them in more complex designs. Challenge yourself, experiment, and don’t stop being curious – that’s how you’ll grow in this field.
Thanks for joining me in this Chisel Simple Project. I hope it was beneficial, and I look forward to discussing more topics in our future articles. Until then, keep coding !
If you liked don’t forget to bookmark, share and comment ! Download the ebook to register to the newsletter !